Showing posts with label uiscrollview. Show all posts

Sunday, June 10, 2018

React Native - How to get Y Offset Value of a view from ScrollView?

Leave a Comment

I am trying to get the scroll position of a view. But the value for Y offset to page which is not related to the view's position.

ScrollView Hierarchy:

<ScrollView>   - MyComponent1   - MyComponent2     - SubView1        - SubView2          - <View> (Added ref to this view and passing Y offset value through props)   - MyComponent3  </ScrollView> 

SubView2 Component:

this.myComponent.measure( (fx, fy, width, height, px, py) => {    console.log('Component width is: ' + width)    console.log('Component height is: ' + height)    console.log('X offset to frame: ' + fx)    console.log('Y offset to frame: ' + fy)    console.log('X offset to page: ' + px)    console.log('Y offset to page: ' + py)     this.props.moveScrollToParticularView(py) })  <View ref={view => { this.myComponent = view; }}> 

I have checked the exact position of a SubView2 view on onScroll method. But did match with the measure value. I can figure it out the measure value is wrong.

Is it ScrollView hierarchy problem?

1 Answers

Answers 1

View component has a property called onLayout. You can use this property to get the position of that component.

onLayout

Invoked on mount and layout changes with:

{nativeEvent: { layout: {x, y, width, height}}} 

This event is fired immediately once the layout has been calculated, but the new layout may not yet be reflected on the screen at the time the event is received, especially if a layout animation is in progress.

Update

onLayout prop gives a position to the parent component. This means to find the position of SubView2, you need to get total of all the parent components (MyComponent2 + SubView1 + SubView2).

Sample

export default class App extends Component {   state = {     position: 0,   };   _onLayout = ({ nativeEvent: { layout: { x, y, width, height } } }) => {     this.setState(prevState => ({       position: prevState.position + y     }));   };   componentDidMount() {     setTimeout(() => {       // This will scroll the view to SubView2       this.scrollView.scrollTo({x: 0, y: this.state.position, animated: true})     }, 5000);   }   render() {     return (       <ScrollView style={styles.container} ref={(ref) => this.scrollView = ref}>         <View style={styles.view}>           <Text>{'MyComponent1'}</Text>         </View>         <View style={[styles.view, { backgroundColor: 'blue'}]} onLayout={this._onLayout}>           <Text>{'MyComponent2'}</Text>           <View style={[styles.view, , { backgroundColor: 'green'}]} onLayout={this._onLayout}>             <Text>{'SubView1'}</Text>             <View style={[styles.view, { backgroundColor: 'yellow'}]} onLayout={this._onLayout}>               <Text>{'SubView2'}</Text>             </View>           </View>         </View>       </ScrollView>     );   } }  
Read More

Monday, May 28, 2018

Can UITableView scroll with UICollectionView inside it?

Leave a Comment

I have the structures below...

enter image description here

I wrap two of collection views into tableview

One is in tableview header(Collection1), another is in tableview 1st row(Collection2).

All the functions are good (Both collection view).

just...

When I scroll up in Collection2, Collection1 will Not scroll up together, because I'm only scrolling the collectionViews not the tableview.

It only scroll together when I scroll in Collection1.

Is it possible to make the header view scroll with user just like app store's index carousel header?

Or I just went to the wrong place, I should use other ways to approach.

2 Answers

Answers 1

Solution

  • When you keep CollectionView1 as a TableViewHeader, CollectionView1 will always on the top of TableView after it reaches top. If you want Collection1 and Collection2 scroll up together, you need to keep CollectionView1 in a cell, not a header.

  • Make sure CollectionView2 content height smaller or equal to TableViewCell's height. As I checked on App Store, they always make SubCollectionView content height equal to TableViewCell's height (If they use TableView).

Result

For more detail, you can take a look at my sample project

https://github.com/nrober1409/DemoAppStoreHeader

Answers 2

Problem

1) Your tableview cell Collectionview (let's say collection2) , Collection 2 is scrollable. So when you scroll up tableview won't scroll up

Solution

1) Just simple and working solution would be height constant , You have to give height constant to the collection2 with >= relationship and 0 Constant value and 750 priority !!

Now the question is how to use this

You need to take IBOutlet of Height constant to your custom tableview cell and need to manage the collectionview height from there.

Here is example

class FooTableViewCell: UITableViewCell {       static let singleCellHeight = 88;      @IBOutlet weak var titleLabel: UILabel!     @IBOutlet weak var descriptionLabel: UILabel!     @IBOutlet weak var iconsCollectionView: IconsCollectionView!     @IBOutlet weak var const_Height_CollectionView: NSLayoutConstraint!      var delegateCollection : TableViewDelegate?  var bars:[Bar] = [] {         didSet {             self.iconsCollectionView.reloadData()             iconsCollectionView.setNeedsLayout()             self.layoutIfNeeded()              let items:CGFloat = CGFloat(bars.count + 1)             let value = (items / 3.0).rounded(.awayFromZero)              const_Height_CollectionView.constant =  CGFloat((iconsCollectionView.collectionViewLayout as! UICollectionViewFlowLayout).itemSize.height * value)              self.layoutIfNeeded()         }     }      override func awakeFromNib() {         iconsCollectionView.translatesAutoresizingMaskIntoConstraints = false         iconsCollectionView.initFlowLayout(superviewWidth: self.frame.width)         iconsCollectionView.setNeedsLayout()         iconsCollectionView.dataSource = self         iconsCollectionView.delegate = self         const_Height_CollectionView.constant =  iconsCollectionView.contentSize.height         self.layoutIfNeeded()         self.setNeedsLayout()     } } 

You can check my answer Making UITableView with embedded UICollectionView using UITableViewAutomaticDimension Very similar and 100% working

Another solution You can also take UICollectionView with sections which contain another horizontal collectionview , with this solution you don't need to manage contentsize for every cell

Hope it is helpful

Read More

Wednesday, January 3, 2018

UIScrollView ContentView dynamic height constraints

Leave a Comment

I am facing issue with contentView height constraints. All labels have dynamic height i.e no fixed height. I have read somewhere to set height equal to scrollview height.

The height of ViewController is currently 870px, scrollview height is 757px. I have no idea how can i set height in AutoLayout , as I am unable to scroll after a certain point.

Appearing in Simulation ViewController in main.Storyboard

I have set UIScrollView first then I added UIView as the child of the UIScrollView then I added 2 UIImageView and few UILabels, the size of UILabel is dependant on the content and content is not fixed. Since the height of UIView is static, when the content of UILabel is quite big, then I am unable to scroll after a certain point.

2 Answers

Answers 1

If what you mean is that you want the scroll view to be the same height/width as the container view:

  1. Go to the storyboard and locate the view
  2. Press "ctrl" and drag from the scroll view to one of the edges of the parent container
  3. Do the same step for all 4 edges (top,left,down,right edges of the scroll view)
  4. You might need to set the constraint to "0" (number of margin pixels from the parent)

Try to follow this picture (make sure all of the lines are bold (turned on) and set the value in the text box to "0":

enter image description here

Answers 2

Do it this way:

  1. Add the scroll view to your view controller and do not set any constraints to it.
  2. Start adding your subviews (images, labels etc) in your scroll view and set the desired constraints. For labels, you don't need to set the height, as they will auto-resize their height depending on content. For other subviews, also set the height or other constraints that will later determine the height (i.e. aspect ratio). If your scroll view gets too small for all the subviews you want to add, drag from its bottom to increase its height. It's important to keep all the subviews inside the scroll view and chain them one to another.
  3. For the last label in the scroll view, add a bottom constraint to the scroll view.
  4. Add margin constraints from your scroll view to the main view (top, leading, bottom and trailing).

Since all subviews are chained and pinned to top and bottom inside the scroll view and the scroll view is pinned to the storyboard's view, this will work.

Do not set the height of the scroll view. Setting it to 757 px is wrong because it renders your scroll view below the screen on devices with a height lower than 757px.

Read More

Monday, November 20, 2017

Increase bottom layout length/inset/padding

Leave a Comment
  1. Subclass UITabBarController
  2. Hide/remove original tab bar
  3. Put custom view to bottom of the UITabBarController view
  4. UITabBarController -> UIViewController -> UIScrollView (pinned to superview all edges, not layout, and set adjusts scroll view insets on vc to true)

Expected: UIScrollView's content is fully visible when I scroll to bottom of the scroll view

Actual: No inset applied and scrollview's content goes under my custom view.

As for iOS 11, additionalSafeAreaInsets is working as needed. But what can I do for iOS 10 & 9?

Overriding bottomLayoutGuide never called. Setting view.layoutMargins did not help

1 Answers

Answers 1

As I understand your problem you want to add bottom margin to your scrollView

class CustomTabBarController: UITabBarController {      var customView: UIView!      override func viewDidLoad() {         super.viewDidLoad()         self.viewControllers?.forEach { controller in             if let controller = controller as? CustomProtocol {                 controller.setBottomMargin(customView.frame.height)             }         }     } }  protocol CustomProtocol {     func setBottomMargin(_ margin: CGFloat) }  class ViewController: UIViewController, CustomProtocol {     @IBOutlet weak var scrollView: UIScrollView!     @IBOutlet weak var bottomMargin: NSLayoutConstraint!      func setBottomMargin(_ margin: CGFloat) {         self.bottomMargin.constant = margin     } } 
Read More

Monday, June 12, 2017

Move UITextField up when keyboard is overlapped

Leave a Comment

There is a subView presented on top of ViewA. Please find the screen layout below. When keyboard is shown on selecting UITextField even if its not overlapping with UITextField the view is scrolled up.

ViewA   -> UIButton  subView   -> UIScrollView         -> UITextField         -> UITextField      ViewA  ----------- |           | |           | |  Button   | |           | |           |  -----------     subView  -------------- |              | |              | |  UITextField | |  UITextField | |              |  -------------- 

I have registered keyboard notification

    - (void) viewWillAppear:(BOOL)animated {          [[NSNotificationCenter defaultCenter] addObserver:self                                                  selector:@selector(keyboardDidShow:)                                                      name:UIKeyboardDidShowNotification                                                    object:nil];          [[NSNotificationCenter defaultCenter] addObserver:self                                                  selector:@selector(keyboardWillBeHidden:)                                                      name:UIKeyboardWillHideNotification                                                    object:nil];     }   - (void) keyboardDidShow:(NSNotification *)notification {              NSDictionary* info = [notification userInfo];             CGRect kbRect = [[info objectForKey:UIKeyboardFrameBeginUserInfoKey] CGRectValue];              UIEdgeInsets contentInsets = UIEdgeInsetsMake(0.0, 0.0, kbRect.size.height, 0.0);             self.scrollViewIb.contentInset = contentInsets;             self.scrollViewIb.scrollIndicatorInsets = contentInsets;              CGRect aRect = self.viewSelf.frame;             aRect.size.height -= kbRect.size.height;             CGRect frame = [self.viewSelf convertRect:self.activeField.frame toView:self.viewSelf.superview];             if (!CGRectContainsPoint(aRect, frame.origin) ) {                 [self.scrollViewIb scrollRectToVisible:self.activeField.frame animated:YES];             }     }  - (void) keyboardWillBeHidden:(NSNotification *)notification {          self.scrollViewIb.scrollEnabled = true;          UIEdgeInsets contentInsets = UIEdgeInsetsZero;         self.scrollViewIb.scrollIndicatorInsets = contentInsets;         [self.scrollViewIb setContentOffset:CGPointZero animated:false];  } 

4 Answers

Answers 1

There's a minor mistake in the coordinate system conversion: convertRect:toView: converts from the coordinate system of the receiver to the coordinates of the passed view.

If self.activeField.frame is a rectangle in the coordinate system of self.scrollViewIb as the code implies, then the conversion should go like this...

    CGRect frame = [self.scrollViewIb convertRect:self.activeField.frame toView:self.view]; 

Notice that I also suggest changing self.viewSelf.superview to self.view. If this code is running in the view controller that contains all of these subviews, then self.view should be sufficient and correct.

Answers 2

I think the problem is that you are always scrolling up, no matter if the keyboard overlaps your textfield or not.

You would have to get the frame of the textfield, calculate the distance to the bottom of the screen and check if the keyboard height (plus possible toolbar on top of it) would overlap your textfield and only then scroll up.

Anyways, I personally gave up on implementing scroll up behavior again and again. I now switched to using IQKeyboardManager. Simply install it as a Pod in your project and call IQKeyboardManager.sharedManager().enable = true in application(didFinishLaunchingWithOptions) and you are all set.

You even get a toolbar with next/previous and done button for free.

Answers 3

Don't get worry when we are in the world with the lots of open libraries.

Use KeyboardLib Lib by adding it to code or by the pod.

Just build it. On every Keyboard open that will show option for the Next, previous arrow with the Done button. Zero line of code with automatic event handling.

May be this one will solve the issue and a solution for the app betterment.

Answers 4

               Add this in your Controller or the other way is to create a category on UITextField               static CGFloat  const  MINIMUM_SCROLL_FRACTION = 0.4;             static CGFloat  const  MAXIMUM_SCROLL_FRACTION = 0.8;             static CGFloat  const  PORTRAIT_KEYBOARD_HEIGHT = 185;             static CGFloat  const  PORTRAIT_KEYBOARD_HEIGHT1 = 230;             static CGFloat  const  LANDSCAPE_KEYBOARD_HEIGHT = 140;             static CGFloat  const  KEYBOARD_ANIMATION_DURATION = 0.3;`                  - (void)textFieldDidBeginEditing:(UITextField *)textField view:(UIView *)view{CGRect textFieldRect = [view.window convertRect:textField.bounds fromView:textField];CGRect viewRect = [view.window convertRect:view.bounds fromView:view];CGFloat midline = textFieldRect.origin.y + 0.5 * textFieldRect.size.height;CGFloat numerator = midline - viewRect.origin.y - MINIMUM_SCROLL_FRACTION * viewRect.size.height;CGFloat denominator = (MAXIMUM_SCROLL_FRACTION - MINIMUM_SCROLL_FRACTION) * viewRect.size.height;                 CGFloat heightFraction = numerator / denominator;                 if (heightFraction < 0.0)                 {                     heightFraction = 0.0;                 }                 else if (heightFraction > 1.0)                 {                     heightFraction = 1.0;                 }                 UIInterfaceOrientation orientation =                 [[UIApplication sharedApplication] statusBarOrientation];                 if([[ UIScreen mainScreen ] bounds ].size.height == 568)                 {                     if (orientation == UIInterfaceOrientationPortrait ||                         orientation == UIInterfaceOrientationPortraitUpsideDown)                     {                         animatedDistance = floor(PORTRAIT_KEYBOARD_HEIGHT * heightFraction);                     }                     else                     {                         animatedDistance = floor(LANDSCAPE_KEYBOARD_HEIGHT * heightFraction);                     }                 }                 else{                     if (orientation == UIInterfaceOrientationPortrait ||                         orientation == UIInterfaceOrientationPortraitUpsideDown)                     {                         animatedDistance = floor(PORTRAIT_KEYBOARD_HEIGHT * heightFraction + 23);                     }                     else                     {                         animatedDistance = floor(LANDSCAPE_KEYBOARD_HEIGHT * heightFraction + 23);                     }                 }                  CGRect viewFrame = view.frame;                 viewFrame.origin.y -= animatedDistance;                 [UIView beginAnimations:nil context:NULL];                 [UIView setAnimationBeginsFromCurrentState:YES];                 [UIView setAnimationDuration:KEYBOARD_ANIMATION_DURATION];                 [view setFrame:viewFrame];                 [UIView commitAnimations];     }                  - (void)textFieldDidEndEditing:(UITextField *)textField view:(UIView *)view          CGRect viewFrame = view.frame;         viewFrame.origin.y += animatedDistance;                 [UIView beginAnimations:nil context:NULL];                 [UIView setAnimationBeginsFromCur rentState:YES];                 [UIView setAnimationDuration:KEYBOARD_ANIMATION_DURATION];                 [view setFrame:viewFrame];                 [UIView commitAnimations];             } 
Read More

Monday, May 29, 2017

Scrolling gets “stuck” when using nested scroll views

Leave a Comment

Problem description:

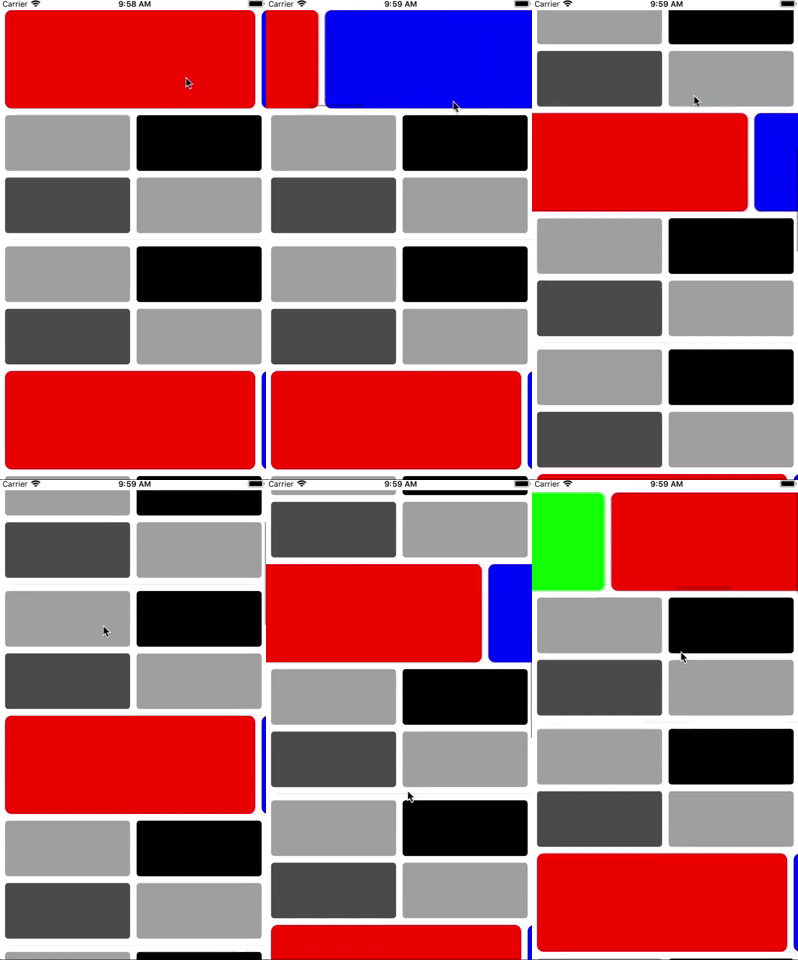
I have one iOS project for browsing images with nested UIScrollViews which is inspired by famous Apple's PhotoScroller. The problem is what sometimes scrolling just "stuck" when image is zoomed width- or height-wise. Here is an example of how it looks on iPhone 4s for image of size 935x1400 zoomed height-wise:

(I start dragging to left, but scroll view immediatly discard this action and image get "stuck")

Scroll problem

Workaround:

I found kind of workaround by adjusting content size of inner scroll view to nearest integer after zooming:

// Inside ImageScrollView.m  - (void)setZoomScale:(CGFloat)zoomScale {     [super setZoomScale:zoomScale];     [self fixContentSizeForScrollingIfNecessary]; }  - (void)zoomToRect:(CGRect)rect animated:(BOOL)animated {     [super zoomToRect:rect animated:animated];     [self fixContentSizeForScrollingIfNecessary]; }  - (void)fixContentSizeForScrollingIfNecessary {     if (SYSTEM_VERSION_LESS_THAN(@"10.2"))     {         CGSize content = self.contentSize;         content.width = rint(content.width);         content.height = rint(content.height);         self.contentSize = content;     } } 

But this fix not perfect - some images now are shown with one-pixel wide stripes on sides. For example, on iPhone 6 for image of size 690x14300 it shows this at the bottom:

iPhone 6

Also, oddly enough, I'm able to reproduce this problem on iOS 7.0 - 10.1, but everything works correctly on iOS 10.2 and greater.

Question:

So, what I am doing wrong? Can my fix be improved?

Test Project:

I created simple test project to illustrate described problem - NestedScrollingProblems. Please note what my version of ImageScrollView is slightly different from Apple's one because I applied another rules for zooming. Also, workaround is commented out by default. (project code is a bit messy, sorry about that)

1 Answers

Answers 1

Can't comment on posts (not enough reps yet).

But by the looks of it (Apple's Docs) this project deinits images on scroll, then re-inits them when they are going to be loaded (see line 350 in UIScrollView.m). And also I have noticed a comment inside of the ImageScrollView.m (line 346) that explicitly says that this class is designed to avoid caching. Which is a practical way for a demo, but not for production, or real-world application that have ui-loading speed in mind like what you want to.

I also noticed that your app has to scroll much further to engage the pagination.. which is either some error in the code, or it might be the lag itself that hangs the main thread from running the pagination fluidly. Or if you intended to have such a wide threshold for pagination.. i'd recomend reducing it for better user experience since modern smartphones has screens much wider than that of the iPhone 4S.

To address this,

I found this post (bellow) on SO that seems to have a pretty decent obj-c method for caching, and fetching image data from such a cache post app-launch. You should be able to work it into post-launch methods pretty simply as well, or even use it with networking to download images from the web. You'd just have to make sure that your UIImage views are properly linked to the url strings you use, either through a set of custom string variables for each image view, or by subclassing UImageView into a custom class, and adding the cache method into it to make your code look simpler. Here's the method and NSCahe class from that post from iOSfleer

NSCache Class:

@interface Sample : NSObject  + (Sample*)sharedInstance;  // set - (void)cacheImage:(UIImage*)image forKey:(NSString*)key; // get - (UIImage*)getCachedImageForKey:(NSString*)key;  @end  #import "Sample.h"  static Sample *sharedInstance;  @interface Sample () @property (nonatomic, strong) NSCache *imageCache; @end  @implementation Sample  + (Sample*)sharedInstance {     static dispatch_once_t onceToken;     dispatch_once(&onceToken, ^{         sharedInstance = [[Sample alloc] init];     });     return sharedInstance; } - (instancetype)init {     self = [super init];     if (self) {         self.imageCache = [[NSCache alloc] init];     }     return self; }  - (void)cacheImage:(UIImage*)image forKey:(NSString*)key {     [self.imageCache setObject:image forKey:key]; }  - (UIImage*)getCachedImageForKey:(NSString*)key {     return [self.imageCache objectForKey:key]; } 

And so as to not change too much of what you've made, it seems that by changing the displayImageWithInfo method inside of ImageScrollview.m to the following one (using the caching method), it seems to work better after initial load. I'd also go a step further if I were you, and implement a loop-style method in the controller's viewDidLoad method to cache those images right away for faster loading at launch. But that's up to you.

- (void)displayImageWithInfo:(ImageItem*)imageInfo {     CGSize imageSize = (CGSize){.width = imageInfo.width, .height = imageInfo.height};      // clear the previous imageView     [self.imageView removeFromSuperview];     self.imageView = nil;      // reset our zoomScale to 1.0 before doing any further calculations     self.zoomScale = 1.0;      self.imageView = [[UIImageView alloc] initWithFrame:(CGRect){.origin.x = 0.0f, .origin.y = 0.0f, .size = imageSize}];      UIImage *image = [[Sample sharedInstance] getCachedImageForKey:imageInfo.path];     if(image)     {         NSLog(@"This is cached");         ((UIImageView*)self.imageView).image = image;     }     else{          NSURL *imageURL = [NSURL URLWithString:imageInfo.path];         UIImage *image = [[UIImage alloc] initWithData:[NSData dataWithContentsOfURL:imageURL]];          if(image)         {             NSLog(@"Caching ....");             [[Sample sharedInstance] cacheImage:image forKey:imageInfo.path];             ((UIImageView*)self.imageView).image = image;         }      }       [self addSubview:self.imageView];      [self configureForImageSize:imageSize]; } 

I would also recomend working around this without removing views from their superview on scroll.. the adding of views is a very heavy task. And coupled with image loading, can be horrendously heavy for a small cpu like the ones on smartphones (since they don't have GPU's.. yet). To emphasize this, Apple even mentions that it does not re-render UIImages once they are displayed, the wording is subtle here, but it clearly does not mention optimized removing then re-adding and rendering views after they have been displayed once (such as is it in this case). I think the intended use here is to display the ImageView, and simply change it's image element afterwards after the controller is displayed.

Although image objects support all platform-native image formats, it is recommended that you use PNG or JPEG files for most images in your app. Image objects are optimized for reading and displaying both formats, and those formats offer better performance than most other image formats.

This is why views are usually added/initialized on their super view before any of the visible loading methods like viewWillAppear and viewDidAppear, or if it is done post-initial load they are rarely de-initialized, their content is often the only thing altered and even then it is usually done asynchronously (if downloading from the web), or it is done from a cache which can also be done automatically with some initializers (you can add this to what I am recommending):

Use the imageNamed:inBundle:compatibleWithTraitCollection: method (or the imageNamed: method) to create an image from an image asset or image file located in your app’s main bundle (or some other known bundle). Because these methods cache the image data automatically, they are especially recommended for images that you use frequently.

On a personnal note, I would try to take the approach of UICollectionViews. Notably, they have delegates which handle the caching of content automatically when views scroll out of the window (which is exactly what this demo is). You can add custom code to those methods too to better control the scrolling effect on those views as well. They might be a bit tricky to understand at first, but I can attest that what you are trying to accomplish here can be replicated with a fraction of the code this demo uses. I'd also take the fact that this demo was built in 2012 as a hint.. it is a very old demo and UICollectionViews appeared at the time this demo was last updated. So i'd say that this is what Apple is has been aiming for ever since because all content-oriented UIView subclasses have some kind of inheritance from UIScrollView anyways (UICollectionView, UITableView, UITextView, etc.). Worth a look! UICollectionViews.

Read More

Sunday, April 16, 2017

How to prevent content offsetting when increasing content size

Leave a Comment

tl;dr I don't want increases in the sizes of UIViews above the top of the UIScrollView's content window to push the content below it downwards.

I have a UIScrollView that displays a list of many UIStackViews, and one of the benefits of UIStackViews is that when you set isHidden = false to one of its subviews, it resizes automatically to compensate for the new view.

Now, each list item has one of these UIStackViews, and the user can press a button that sets isHidden = false to a subview in each one, all at once. That means, each list item will increase by an amount equal to the height of the unhidden view (the same height for each stack view).

There is no problem if the scrollview's contentOffset is zero, because all the increases in height will just push all the rest of the content downwards, and the user will still be at the top of the scrollview after all the views have unhidden.

The problem is when the user is not at the top of the scrollview. When this is the case, and the user presses the button that unhides all the views, the increases in height will push all the views downwards, giving the appearance of scrolling upwards. The further down the user is scrolled in the list, the more views above it, and the greater the content shift when the user presses the button.

The behavior I'm looking for is the same as when the user presses the button when they are scrolled to the top of the view, but at any scroll position. In other words: regardless of where the user is scrolled too, when they press the button, the only views that are pushed down are the ones below the top of the scrollview's content window.

Any idea how to accomplish this?

1 Answers

Answers 1

Okay, so let me see if I understand your question properly.

This is the state of the Scroll View

 A  B  C  D  E 

When the user presses the "expand all" button, it looks like this:

 A  -1  -2  -3  B  -1  +-a  +-b  -2  C  -1  -2  -3  D  -1  -2  E  -1  -2  -3  -4 

The problem is that if the user is currently looking at

+---+ |D  | |E  | +---+ 

(which are the 4th and 5th items in the list) they end up seeing in the expanded list:

+---+ |B  | |-1 | +---+ 

But they should be seeing items D that they were looking at prior.

I would probably recommend using a UITableView as you can store the currently visible TableViewCells and then as the view animates, scroll to the current cell (which should keep it relatively in-view).

In your case, with the UIScrollView what I would recommend is capturing the current visible subviews (using current contentOffset/Size and the frames of the subviews), then figuring out where they are after the view animates it's size transition, and then scroll to the new position.

This is, as I mentioned, a task better suited to UITableView or UICollectionView where the parent objects are tracked and cached by the OS and there are specific rules governing the insertion/deletion of rows/cells.

HtH

Read More

Monday, April 11, 2016

Scrolling to the end of UITextView's text

Leave a Comment

I have some contents in a view (such as images, labels) and the last item is a description (UITextView). Now I am trying to scroll the contents dynamically based on UITextView text. Here is my code:

- (void)viewDidAppear:(BOOL)animated {      _descriptions.scrollEnabled = NO;     [_descriptions sizeToFit];      _infoScrollView.contentSize = CGSizeMake(_contentsOnInfoView.frame.size.width,                                              _contentsOnInfoView.frame.size.height + _descriptions.frame.size.height); } 

Here is the result:

As you can see, there is lots of empty space. I need to scroll to the end of text.

4 Answers

Answers 1

I'd suggest you to try this.

[myTextView scrollRangeToVisible:NSMakeRange([myTextView.text length], 0)] 

Answers 2

You should write you code in

-(void) viewDidLayoutSubviews {} 

In this method,All components have frame according to running device size. and execute before appear the view.

Answers 3

//may be it will work for you NSMutableParagraphStyle *paragraphStyle = [[NSMutableParagraphStyle alloc]init];     //set the line break mode     paragraphStyle.lineBreakMode = NSLineBreakByWordWrapping;      NSDictionary *attrDict = [NSDictionary dictionaryWithObjectsAndKeys: description.font,                               NSFontAttributeName,                               paragraphStyle,                               NSParagraphStyleAttributeName,                               nil];       CGRect rect = [description.text boundingRectWithSize:CGSizeMake(description.size.width, FLT_MAX)                                                   options:NSStringDrawingUsesLineFragmentOrigin                                                attributes:attrDict                                                   context:nil];     CGSize size = rect.size;    _infoScrollView.contentSize = CGSizeMake(_contentsOnInfoView.frame.size.width,description.frame.origin.y + size.height + 20) 

Answers 4

I just found the answer,in the UI there is line that separates descriptions with the some infos ! I just calculate the line's y and sum up with the descriptions height :

_descriptions.scrollEnabled = NO; [_descriptions sizeToFit]; _infoScrollView.contentSize = CGSizeMake(_infoView.frame.size.width, _line.frame.origin.y + _descriptions.bounds.size.height); 

now it works fine !

Read More

Wednesday, March 16, 2016

CAShapeLayer poor scrolling performance. Why?

Leave a Comment

I have a single container view inside a UIScrollView, and that container view has several CAShapeLayer based subviews (about 200). Each CAShapeLayer contains a very simple CGPath (a filled polygon of about 10 points). You can see it as a sort of map.
The container view itself is big (about 1000x2500 points) but I have implemented zooming using the transform property (I'm not using UIScrollView implementation), so at small scales it's entirely visible.

At high scales (only a part of the container view is visible on screen) this works great and scrolls smoothly, even on old hardware.
However, at small scales (when most of the container view is visible), this results in very bad scrolling performance on old hardware (40 fps on an iPhone 4S). And if I go over 200 subviews (which is something I would like to do), this is much worse (down to 15fps) even on newer hardware.

I have done some profiling but I can't find the bottleneck. During scrolling I make the following measurements (on average) :

Activity monitor instrument :     CPU : 8% GPU driver instrument :     Device utilization : 40%     Renderer utilization : 35%     Tiler utilisation : 8%     FPS : 40 

Here is what I have tried :

  • Setting shouldRasterize with the proper rasterizationScale on all CAShapeLayer. It makes things worse.

  • Setting shouldRasterize with the proper rasterizationScale on the layer of the container view. This improves scrolling for very small scales (when the entire container is visible inside the scrollView), but makes it much worse for bigger scales. Activating rasterization only for for small scales leaves a gap (between 0.5 an 2.0 approximately) where both options result in lost frames.

  • Using layers only instead of views. Doesn't improve anything.

  • Using CATiledLayer for the container view layer. Doesn't improve anything.

Any ideas ? If there was a limitation of the hardware shouldn't I see a 100% somewhere ? What else should I be profiling ?

At this point the main thing that I'm asking is help on how to profile my app and understand what is causing lost frames. Then maybe, depending on what is happening and what is doable, I will try to improve things. I'm not asking for every single possible tweak in the book that could maybe improve things a little if i'm lucky.

1 Answers

Answers 1

I suspect that it is caused by your zooming. Every pixel you scroll it will call your zooming calculation. To my experience, when I have a large picture zoom in a small scale of screen, it would be extremely slow when scrolling because the view has to redraw it every single pixel.

And if you don't need any animation attached to your CAShapeLayer, use CGLayer instead, it is faster when you are using scale function.

From Apple

Color Blended Layers. Shows blended view layers. Multiple view layers that are drawn on top of each other with blending enabled are highlighted in red. Reducing the amount of red in your app when this option is selected can dramatically improve your app’s performance. Blended view layers often cause slow table scrolling.

Bottlenecks for an OpenGL app are usually GPU or CPU bottlenecks. GPU bottlenecks occur when the GPU forces the CPU to wait for information because the GPU has too much information to process. CPU bottlenecks occur when the GPU has to wait for information from the CPU before the GPU can process it. CPU bottlenecks can often be fixed by changing the underlying logic of your app to create a better overall flow of information to the GPU. Common bottlenecks include: Geometry limited. If Tiler Utilization is high, examine your vertex shader processes. Pixel limited. If Rendered Utilization is high, examine your fragment shader processes. CPU limited. If Tiler Utilization and Rendered Utilization are both low, the performance bottleneck may not be in your OpenGL code. Examine your code’s overall logic.

Read More